Well I thought I would check up on this blog and turns out I haven't posted on it for a year! Well over a year in fact!! I am fidning it really hard to get time to taek decent photos and then post them up along with working long hours and also studying. Anywho I am going to try my best to try and get this going again.
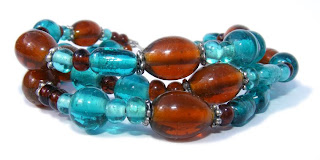
I have started a new venture of beading and doing fused glass. I need to get some good photos of some of my pieces to post them on here. It is really funky and I love doing it. I have started a Flickr account to post all the photos up on so I will have that linked to this blog so you can all check out my photos which I don't post up.
Hope you are all keeping well. Sorry for the delayed post :P
Bree
Photo Editing
Posted in on by
I have finally worked out how to get my photos the way I want them! Perfect white background! It might not work on other pieces which are majority white or lighter colours as it might blend in a little bit. Anyway here is a before and after pic of one of the photos I took the other day.
BEFORE

AFTER
If you would like to know how I did it just follow my directions below.
First you need photoshop for this. I use Photoshop CS (i think). You need the photo to have a solid background so either take the photo on a piece of paper or in a photo tent or something.
Next open your photo in photoshop and resize/crop to what you like or want. Next click on Image -> Adjustments -> Levels. A little box should pop up with a weird looking graph thing. If you look on the right hand side above where is sayis 'preview' there should be some eyedropper icons. Pick the one on the far right which should be the 'Set white point' eyedropped. Next click on the background of your photo where it should be white, and voila!
You may get some shadows or colours around the edges on the photo. This is fine, just either erase it or over it with a white spray paint, which is what I do.
BEFORE

AFTER

If you would like to know how I did it just follow my directions below.
First you need photoshop for this. I use Photoshop CS (i think). You need the photo to have a solid background so either take the photo on a piece of paper or in a photo tent or something.
Next open your photo in photoshop and resize/crop to what you like or want. Next click on Image -> Adjustments -> Levels. A little box should pop up with a weird looking graph thing. If you look on the right hand side above where is sayis 'preview' there should be some eyedropper icons. Pick the one on the far right which should be the 'Set white point' eyedropped. Next click on the background of your photo where it should be white, and voila!
You may get some shadows or colours around the edges on the photo. This is fine, just either erase it or over it with a white spray paint, which is what I do.
New Beads!!
Posted in on by
Today I went to the Creative Living Expo at Rosehill Racecourse for the first time. Was quite small but was still good and was nice to go bead shopping and pick up some bargains. The only downfall was there weren't many stalls selling Swarovski crystals and I really wanted to get some!
Anyway here are some pics of the things that I got.


Anyway here are some pics of the things that I got.


New Project
Posted in on by
Well I haven't updated in over a week and don't I feel slack. I have had so much stuff going on lately I've been getting sleep any spare moments that I have.
Anywho there is a new challenge on the beading forum in the polymer clay section for miniatures. So I've decided that I am gonna try and do some! Yay!
So far my ideas are to do a basket with some flowers in it, a vase with some flowers either roses or something with long stems and then I also might try ice cream or a banana sundae..mmm that makes me hungry just thinking about it.
Should hopefully be done over the next few days but I can't make promises because Feb is going to be a very very busy month for me. I also have a new necklace which I need to post but it's been pouring here so haven't had the chance to get any good photos outside.
Anywho there is a new challenge on the beading forum in the polymer clay section for miniatures. So I've decided that I am gonna try and do some! Yay!
So far my ideas are to do a basket with some flowers in it, a vase with some flowers either roses or something with long stems and then I also might try ice cream or a banana sundae..mmm that makes me hungry just thinking about it.
Should hopefully be done over the next few days but I can't make promises because Feb is going to be a very very busy month for me. I also have a new necklace which I need to post but it's been pouring here so haven't had the chance to get any good photos outside.
Book Review - Beading Inspiration: How to use colour in jewellery design
Posted in on by TITLE: Beading Inspiration
How to use colour in jewellery design
AUTHOR: Bead & Button Magazine,Beadstyle Magazine
PUBLISHER: Kalmbach Pub Co
PUBLICATION YEAR:2007
FORMAT: Softcover
Well this is my book which arrived from the states not long a go. I read a review for it in one of my Australian Beading magazines and thought it looked really good and sometimes I do struggle knowing what colours to put together and if 'this' goes with 'that'.
It is approximately 96 pages and the reading is easy and the instructions are simple to follow.
The book begins off with giving some ways of where we can get inspiration from such as nature for example and also explains how a colour wheel works, which I found to be very very helpful. It also has a couple of pages on basic techniques which is good for beginners and it also taught me a few things.
From them on in it has over 30 different projects incorporating colours and showing which colours go with what. I found it really good for the main fact is I struggle with colours that I don't use very often like reds or browns. At the end it also shows how to use metallics in jewellery like silver, bronze and gold. I have found it hard sometimes to make a piece which is majority gold or silver yet finding a colour which won't stand out so bright when used.
All of the projects have a step by step guide with photos showing you exactly how to create each piece. I LOVE instructions which come with photos because I am more of a visual person, sometimes words just don't cut it for me or I talk myself around in circles. I haven't made anything as such from the book yet but I am loving some of the designs and definitely have got some inspiration and ideas from it.
I'm not too sure on the price of this item, as I did buy it from Amazon and all the prices were in American currency. I haven't checked the credit card bill either hehe to see how much it was. I think it is worth it though for anyone who wants some inspiration or wants to learn how to use colours.
Subscribe to:
Posts (Atom)


